


Beginning Android Development Part One: Installing Android Studio
- Introduction to Android Studio #1
Clearly there’s a demand for Android app development since there are over one billion active devices around the globe. To say that it’s an exciting platform and space to make apps for is an understatement.
Getting Started
There aren’t any prerequisites for this beginning Android development tutorial, other than a willing mind and a Mac — you can certainly develop for Android on PC, but these instructions are tooled for Mac-based developers.
You’ll learn how to set up all the tools you need and will walk away as an Android developer-in-training. Here’s what you’ll do in this beginning Android development tutorial:
- Download and install Android Studio.
- Set up testing for your app on devices and emulators.
- Create a simple “Hello World!” Android app that prints to your device’s or emulator’s screen.
- Import a sample project into Android Studio.
Installing Android Studio
One of the most important parts of getting started with any new platform is setting up your environment, and it’s no different with Android.
It’s important to take your time and follow each step methodically. Even if you follow the steps perfectly, you may have to troubleshoot a small issue or few. Your system configuration or product versions can make for unexpected results.
With all of this in mind, let’s quickly check that you have the Java Development Kit (JDK) installed. To check, you’ll use trusty old Terminal. In a nutshell, using Terminal is kind of like looking under your car’s hood. It’s how you really get to know the machine face-to-face, without any complex graphical interface to interfere.
You can find the Terminal app quite easily on a Mac: open Launchpad and type terminal into the search at the top of the screen and select Terminal when it shows up

Once you have the Terminal open, type in
java -version. You should see some output that mentions a version number, like below.
If that’s not what you see, then you don’t have the JDK installed. Terminal might tell you
-bash: java: command not found, or it could say No Java runtime present, requesting install. and trigger a pop up that will lead you down the yellow brick road…to Oracle’s website.
You can either click More Info… or head over to Oracle to download the JDK from Oracle.
Install the JDK if needed, and once you’re done, head over to the Android Studio page and click the Download Android Studiobutton.
.

Google constantly updates this page, so the version you see may very well be newer than the screenshot above. Once you click the button, you’ll see a request to agree to the terms and conditions.

After reading these carefully (everybody takes the time to fully read these, right?) accept and click the blue button underneath titled Download Android Studio. Once the download is complete, you can install Android Studio similar to how you install any other program.
The download page will redirect to a page that contains installation instructions for OS X, Windows and Linux Operating Systems. If the instructions don’t appear, then you can view them here.
Once installation wraps itself up, go ahead and launch Android Studio!

The setup wizard will greet you the first time it loads.

Click Next to move to the Install Type screen. This whole process will probably take several minutes.

Check the box for Standard and click Next.

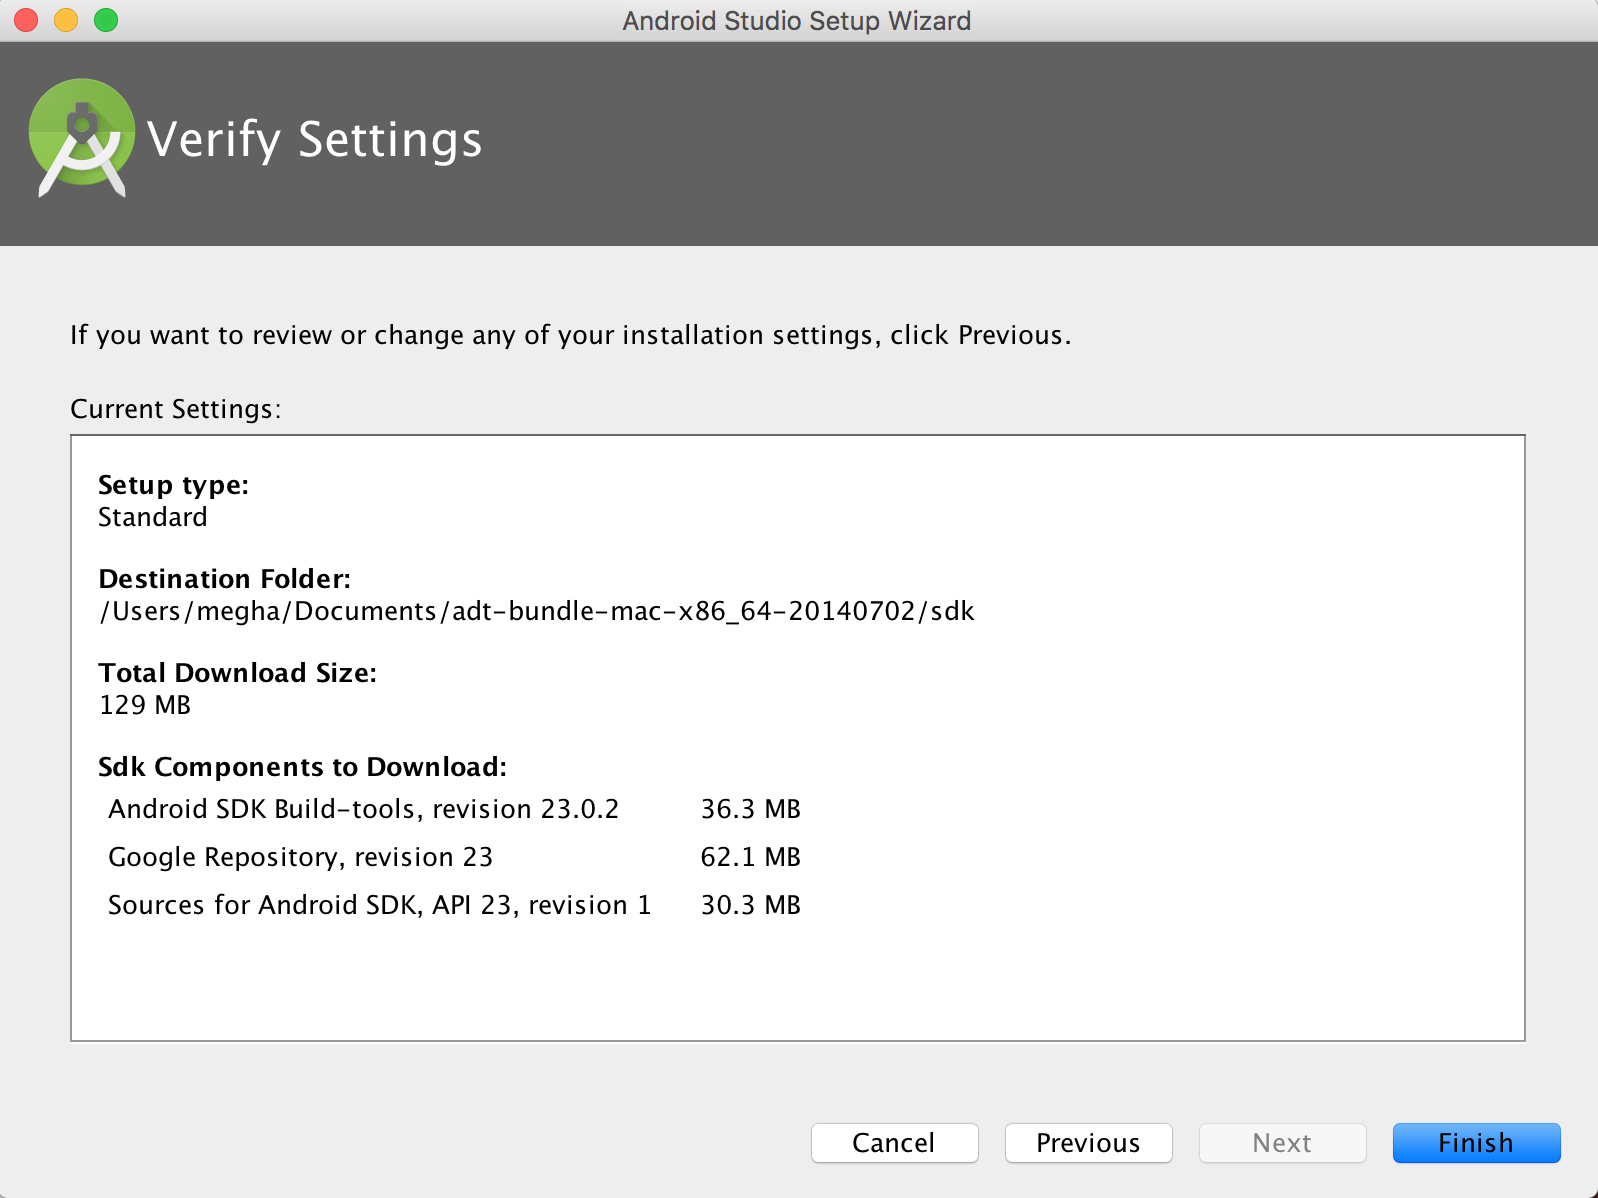
On the Verify Settings window, you’ll have an opportunity to confirm your setup. Click Finish to start downloading the SDK components. Once everything downloads, click Finish.

After a few minutes, you’ll have the welcome screen, which serves as your gateway to building all things Android.

Even though you just downloaded it, it’s possible that it’s not the latest version. Check whether any updates are available by clicking check for updates at the bottom of the welcome screen. If an update is available, a window like the screenshot below will appear. Select Update Now and let it do its thing.

The Android SDK Manager
Each version of Android has its own SDK (Software Development Kit) that enables you to create applications for the Android platform. Since you just went through the setup wizard, you’ll already have the latest version of the SDK available to you.
Installing a New SDK
However, it’s useful to know how to install additional versions of the SDK so that you can develop for all supported versions of Android.
SDKs also allow you to create AVDs (Android Virtual Devices) that are customized to your personal configuration for the purpose of testing your app.
From the Android Studio welcome screen, click Configure.


The first tab of this window, SDK Platforms, lists the Android SDK platform available for download.
Enable the Show Package Details option to see individual SDK components, such as the platform itself and the sources pertaining to the API level like system image. Take note of the checkbox next to the SDK platform; it will be pre-selected if an update is available.
By default, the SDK Manager installs the latest packages and tools. Select the SDKs as shown in the screenshot above. If you wish to install other SDKs, just select them for installation.

The SDK Tools tab lists developer tools and documentation along with the latest versions. Similar to the first tab, checking the Show Package Details will display available version of SDK tools.
The first three components in this list, for example, are Android SDK Build Tools, Android SDK Tools and Android SDK Platform-Tools. Each contains components that are designed to assist in the development of Android and work across multiple SDKs. Go with the default selection on this tab

The SDK Update Sites tab displays the update sites for Android SDK tools and add-ons. You’re not limited to what’s listed because you can add other sites that host their own Android SDK add-ons, and then download them from those sites.
For the purpose of setting up correctly, select the options that are checked in the screenshot above. Click Apply at the bottom if it’s active. You’ll be presented with a confirmation dialog for the chosen packages; accept and continue. Click OK to close out the window.
The window will disappear and the SDK Manager will download and install the selected items. Once it’s done, click Finish. You’ll be directed back to the SDK Manager window where clicking OK will take you back to the Welcome to Android Studio.
Now the fun begins!
Creating Your First Project
Android Studio has a nice little step-by-step tool to help you create your project. Click Start a new Android Studio Project from the Welcome to Android Studio screen:

Note: If you currently have an Android Studio project open and can’t see the welcome screen, select File\New Project from the menu to create a new project.
Identify Your Project
Android Studio will present you with a project creation screen:

Enter OMG Android in Application name as shown above. Feel free to put your own name in the Company Domain text field. As you type, you’ll notice the Package Name automatically changes to create a reverse domain style name based on your entries.
The Package Name is used to uniquely identify your app so that any work performed by a device is always properly attributed to the source, thus preventing confusion between apps.
You can set the Project location to any location on your hard drive — keep the default if you don’t have a preference. Click Next at the bottom of the window.
Choose an SDK
The next screen is the Target Android Devices window. This is where you select device types and operating systems to target.
The Minimum SDK drop-down menu sets the minimum version of Android required to run your app. The newer the SDK, the more features you’ll have at your disposal; however, newer SDKs support fewer devices.
Selecting this value is simply a matter of balancing the capabilities you want and the devices you want to support. This is where developing for Android can get a little tricky.
If you really want to get into the details of what Minimum SDK version is best for your App, let Android Studio help you out.
As you change the Minimum SDK in the drop down menu, the percentage in the text underneath reflects what percentage of devices currently run that version of Android.
Click Help me choose underneath the drop down list to learn more about each SDK’s set of features.

For more information on API versions and their uses, check out the Android Dashboards, which are updated every few days.

For now, you just want an App that works on an Android Phone, and that is what you’ll see by default, alongside the default Minimum SDK. For this project, select SDK of API 16: Android 4.1 (Jelly Bean).

Set the Default Activity
After you choose the SDK, you choose a default
activity for your app.
Think of an activity as a window within your app that displays content with which the user can interact. An activity can take up the entire screen or it could be a simple pop-up.
Your options on this particular template range from a blank activity with an Action Bar right up to an Activity with an embedded
MapView.
You’ll make a lot of activities as you develop apps, so get to know them and know them well.
Select the Blank Activity option and click Next.

To speed this part up a little bit you’ll use the pre-populated default values, but what is actually done with these values?
- Activity Name: This gives your activity a name to refer to in code. A .java class will be created and will use the contents of this text field to give the class a name, which will ultimately be the name you use to refer to this activity in your code.
- Layout Name: You’re going to define your activity in Java, but the layout it shows to the user is defined in a special sort of Android XML. You’ll learn how to read and edit those files shortly.
Click Finish.
Android Studio takes this as a cue to go do a bunch of behind-the-scenes operations and create your project. As it shoots out descriptions of what it’s doing, you may notice it says something like this:

You see your project name, which is familiar. But then there is this Gradle word, and then a mention of Maven in the URL.
The benefit of having a modern IDE like Android Studio is that it handles a lot for you. But, as you’re learning how to use the software, it’s good to have a general sense ofwhat it’s doing for you.
Gradle
Gradle is a relatively new build tool that’s easy to use, and if you investigate further, you’ll find it contains advanced options. It takes your Java code, XML layouts and the latest Android build tools to create the app package file, also known as an APK file.
Gradle is a relatively new build tool that’s easy to use, and if you investigate further, you’ll find it contains advanced options. It takes your Java code, XML layouts and the latest Android build tools to create the app package file, also known as an APK file.
You can customize your configurations to have development or production versions of the app that behave differently, or you can add dependencies for third-party libraries.
Maven
Maven is another project build tool, and it can also refer to the Maven Central repository of java libraries.
Maven is another project build tool, and it can also refer to the Maven Central repository of java libraries.
It’s absurdly easy to use Gradle and Maven Central in concert with Android Studio to incorporate all sorts of functionality from the Android development community. If you’re familiar with iOS, then know that these give you cool developer superpowers much as CocoaPods does.
After a brief moment, Android Studio will finish building your project. The project is pretty empty, of course, but it has everything it needs set up so that it can be launched on an Android device or emulator. You’ll be dropped off in this spot:

And that’s all it takes to create a Hello World project on Android Studio! Now to dress it up and work through building and running this project on an emulator.
Running on an Emulator
You’ve got Android Studio and you’ve created an app. So how do you run it?
Android Studio comes with the ability to set up a software-based Android device on your computer and run apps on it, browse websites, debug and everything you would expect from a simulator. This capability is known as the Android Emulator.
You can set up multiple emulators and set the screen size and platform version for each to whatever you like. Good thing, too. You’d need a whole room dedicated to storing devices for testing because there are so many out there — okay, maybe that’s an exaggeration, but you get the idea. :]
If you ran through the setup wizard earlier using the standard installation, then you’ll already have an emulator set up and ready for you. Android Studio makes use of some useful software developed by Intel to ensure your emulator runs quickly.
Up until recently, your computer would have to emulate everything an Android device would try to do, right down to its hardware, which runs an ARM-based processor. Most computers make use of x86-based processors, meaning your computer would have to do computationally intense tasks that take a significant amount of time just to test your app.
You still have the option to create an emulator that is as close to an actual device as you can, but be aware that the initial load times can drag a bit and have put off many an Android developer from using the emulator at all.
With all of that being said…let’s set up an emulator anyway, because you do need to know how!
Creating an Emulator
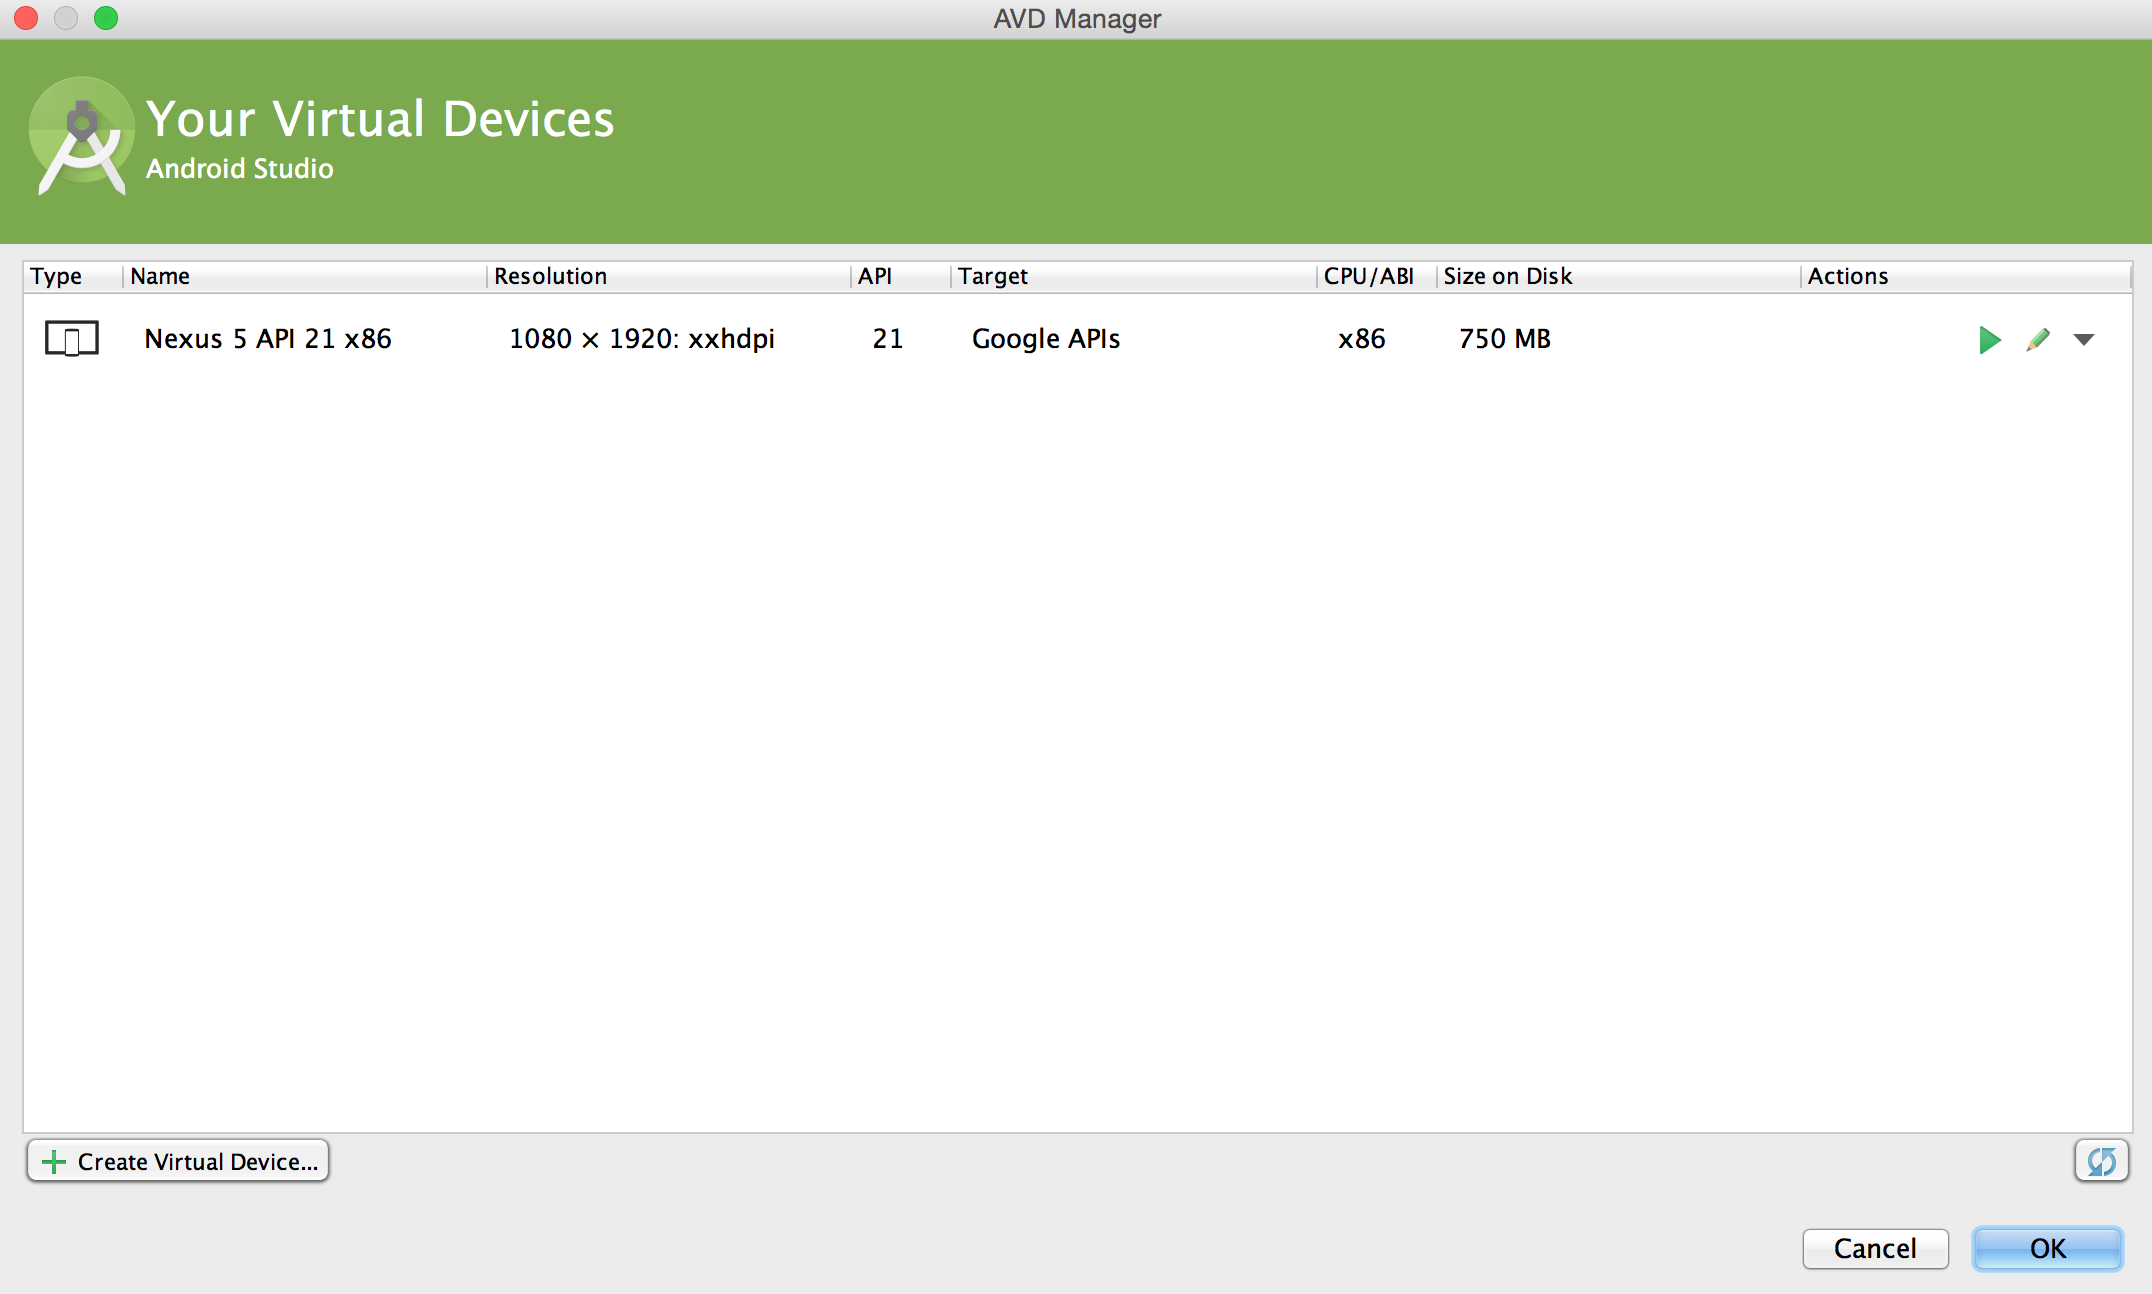
Click AVD Manager. It’s a button near the right side of the toolbar that shows an Android popping its head up next to a device with a purple display:

Once AVD Manager opens, you’ll probably see the default emulator and a few details about it, notably what type of emulator it is, what API it’s using, and what CPU instruction set it uses.

Alternatively, if the default device hasn’t been created for you, you’ll just see an option to create a new device. Either way, work through the process of creating a new AVD so you know how to do it. Click Create Virtual Device… in the bottom left to begin configuring a new virtual device.

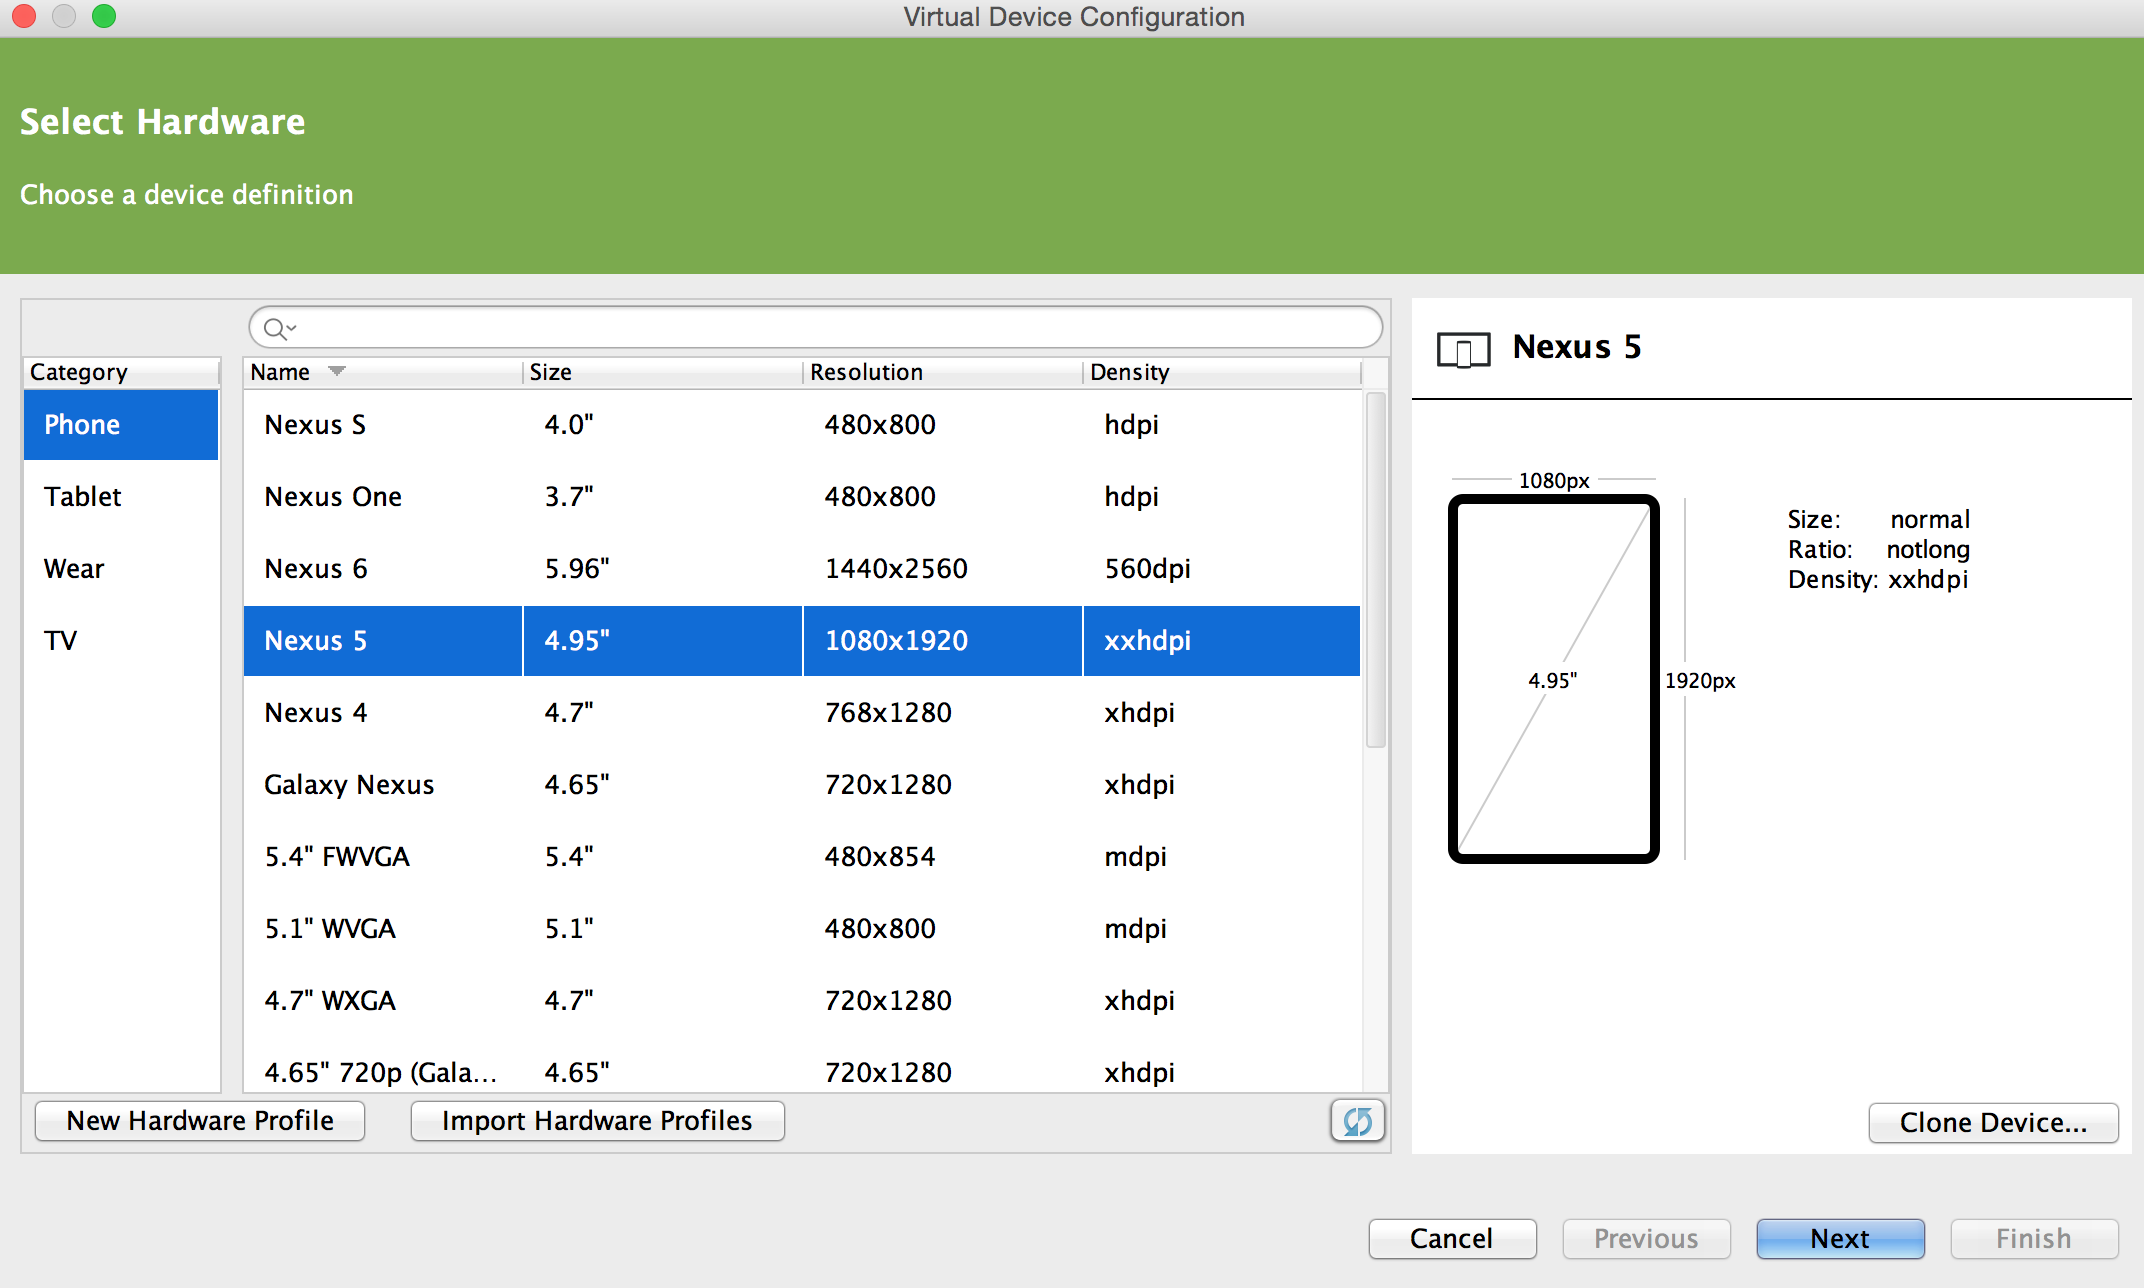
The first decision you need to make is what type of device. The Category list on the left shows all the types of devices you can emulate. In the middle, you see a list of specific devices. Take a moment to explore.
For now, you just want to emulate a phone-sized device, but if you wanted to emulate an Android Wear watch or an Android TV then you have options to do so here.
Select Nexus S in the list of devices available to you from the phone category and click Next.
Now you’re at the step where you decide what version of Android the virtual device will run. You’ll already have one or two available to you thanks to the setup wizard, so lets use one of them.
Select Lollipop and make sure the one selected has the value x86 in the API column so the emulator runs as fast as possible on your x86 computer.

Click Next once you’re done to advance to the final screen.
Note: If you can’t click Next, then you probably need to download some archives. Go back to your selection and click Download. When it’s done, you’ll be able to move forward.
The last screen lets you confirm your choices and gives options to configure some other properties such as device name, startup orientation and RAM size. For now, use the defaults and click Finish.


Close the AVD Manager to go back to Android Studio’s main view. Now that you’ve configured everything, click the Run button.

A new window will appear, asking you to choose the device you wish to test your App on. You currently have no devices running, so select the Nexus S you just created.
Ensure the Launch Emulator radio button is checked and that your AVD is selected in the drop down menu then click OK.

Note: If you get an error that says This AVD’s configuration is missing a kernel file!!, check to make sure that you don’t have the ANDROID_SDK_ROOT environment variable set from a previous installation of the Android SDK. See this thread on Stack Overflow for more troubleshooting tips.
In the event that it doesn’t work the first time or takes several minutes for the emulator to fire up correctly, don’t worry, that’s not entirely unexpected. Stick with it. Once it’s ready, you should see something like this:

Whoa. You just made your first Android app

Running on a Device
If you have an Android device and want to run your app on it, follow the animated GIF on the right. It demonstrates how to enable developer mode on your device.
Here are the step-by-step instructions to enable Developer Mode on an Android device:
- Go to Settings on your device.
- Scroll all the way down and select About phone.
- Scroll to Build number and tap in multiple times. You’ll see a toast come up that states “You’re n steps away from becoming a developer”. Keep tapping and it will change to “You’re now a developer!” once it’s enabled.
- Go back to Settings screen and scroll all the way to the bottom. You’ll now see Developer Options enabled.
- Select Developer Options. Next, turn on the USB debugging switch under the Debugging section.
- Connect your device to your computer via USB.
- You’ll now be prompted to confirm this option via a dialog that states Allow USB debugging? — click OK.
- Next, you’ll be asked to register your computer’s RSA key fingerprint. If this is a trusted machine, then check the Always allow from this computer option.
Now that you’ve configured your device, click the Run button.

Next, you’ll get a prompt from the Device Chooser dialog. The device you enabled the developer mode should now appear in this dialog. Select it and click OK.

Ahh…isn’t it rewarding to see the app on your device? Go ahead and show it off to your friends. :]
Importing an Existing Project
During your Android app-making journey, you’ll find times where you need to import existing projects. The steps below will guide you through how to import a project:
- Download this project so you have a test subject.
- Once downloaded, unzip the contents and place them somewhere easy to get to.
- In Android Studio, go to File/New/Import Project….
- A window labeled Select Eclipse or Gradle Project will appear. Select the unzipped project from Step 1 and click OK.

- After Android Studio finishes importing, you’ll be dropped off on the screen below. Select the Project tab on the left panel as indicated in the screenshot below.

- If that’s not what you see,
- You’ll now see all the necessary files of the imported project in the project explorer.

It’s build and run time! Click the run button in the toolbar and select either the emulator or device you’ve already set up.


No comments:
Post a Comment